
Chưa có sản phẩm trong giỏ hàng.
Kỹ thuật trồng măng tây, Tin tức
COMMERCIAL ASPARAGUS PLANTING GUIDE – Tài liệu nước ngoài
Mục lục
Asparagus is a valuable and versatile vegetable that offers exceptional returns for commercial growers. Successfully cultivating asparagus requires understanding its specific planting and maintenance needs to ensure a bountiful harvest. In this comprehensive guide, let’s with mangtay.net explore essential tips and best practices for commercial asparagus planting, including soil preparation, planting techniques, and ongoing care to maximize yield and quality.
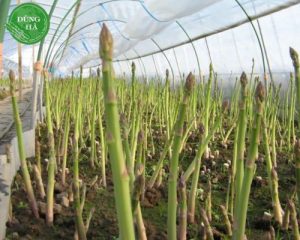
Temperature, soil and fertilization
Asparagus grows best under maximum photosynthesis conditions: a long growing season and sunny days. Ideal day temperatures during the growing season are 75 to 85 degrees F with night temperatures 60 to 70 degrees F.
Asparagus is most productive on deep, well-drained sandy loam soils, but it will do well on other soils if it has good drainage. Asparagus plants lose vigor, become more susceptible to root rot, and die in poorly drained areas or following prolonged high rainfall.
It is very important to test your soil annually to determine pH and fertilizer requirements. Asparagus grows best when the pH is between 6.7 and 7.0. Nitrogen should be applied at a rate of 75 lbs. of actual nitrogen per acre, phosphorous at 250 lbs. per acre, and potassium at 300 lbs. per acre.
Planting crowns
Use only healthy one-year-old crowns that are free of Fusarium root rot. (Our crowns are inspected by the New Jersey Department of Agriculture and are free of Fusarium.)
Prepare your field by broadcasting fertilizer at the above rates and working it in. Using a lister plow or middle buster, open a V-trench 6-8 inches deep. The Jersey Male Hybrids have been found to perform best when planted 6-8 inches deep. Apply super triple superphosphate (0-46-0) in the bottom of the trench at a rate of 200 lbs. per acre. (This is in addition to the phosphorous that was applied earlier.)
Research has shown that the crowns will grow more vigorously when 0-46-0 is used. It will not burn the crowns. Drop the crowns in the trench. The buds do not have to be facing up. We suggest laying them on their sides. Distance between crowns (bud to bud) is determined by the spear diameter required.
A thick spear (1/2 inch – 3/4 inch) is obtained by planting the crowns 10-12 inches apart. A thinner spear (3/8 inch – 5/8 inch) is obtained by planting 6-8 inches apart. Once the crowns are placed in the trench, cover them with 1-2 inches of soil. Cover as soon as possible to prevent any sun damage.
The distance between rows is usually determined by the spacing of your equipment. We recommend planting no closer than 4.5 feet between rows. Jersey male varieties are very vigorous in their growth. If planted too close together, their ferns will become very dense and restrict air circulation. This creates a stagnant atmosphere where diseases can easily take hold and flourish.
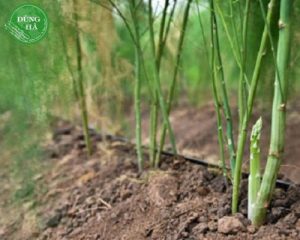
When the aspagarus grows
Gradually fill in the trench with soil, being careful to avoid covering any asparagus foliage. The trench should be filled to ground level by the end of the first growing season. Side dress a 5-10-10 fertilizer in late July or early August at the rate your soil test specifies. Late in the fall of the first growing season, after the fern has turned completely brown, remove the brush (old stalks) and any weeds.
In the following spring broadcast lime as needed to maintain the proper soil pH, add fertilizer and apply herbicide. Remove brush after it has turned brown during each succeeding fall. Each spring, before the asparagus emerges, broadcast lime if your annual soil test determines it is needed.
At the same time spread half of the recommended fertilizer and work it in. Apply the herbicide. Immediately after the harvest season ends, spread the other half of the recommended fertilizer, work it in, apply the herbicide, and then irrigate one inch of water. This will help speed the development of the fern so the photosynthesis process can begin.
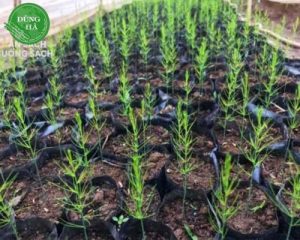
Planting seedlings
If growing seedling transplants, sow the seed in late winter in a greenhouse 12 to 14 weeks before you plan on transplanting them to the field. Seedlings should be planted in the field only after the possibility of frost has passed. Use a commercial potting mix of peat moss and vermiculite and sow one seed 3/4 inch deep in small pots (2 inches diameter) or seed 2 inches by 2 inches in flats.
Germinate seed at 75 to 80 degrees F during the day and 65 degrees F at night. Adequate soil moisture is important during the first growing season. Weekly applications of irrigation sufficient to wet the soil 8 inches deep should be adequate. After the first growing season, asparagus plants do not require frequent irrigation because of their deep and extensive root system. Thorough watering (2 – 3 inches of water) slowly applied every two weeks during dry weather is sufficient.
Apply a soluble, complete fertilizer, such as 15-15-15, at half the recommended rate 4, 8, and 12 weeks after sowing the seed. Rinse the foliage lightly with water after fertilizing to avoid injury to the tender growth. Excessive fertilization promotes large, over-tender tops and small root systems with limited reserves in the storage roots. Watch for aphids and thrips! They will stunt the growth of young seedlings. In the field, planting seedlings is similar to planting crowns.
The only difference is in the shape of the trench: instead of a V-shaped trench, you must make a W-shaped trench. (This is usually accomplished with homemade trenchers.) The W-trench keeps the seedling above standing water in case of a hard rain.
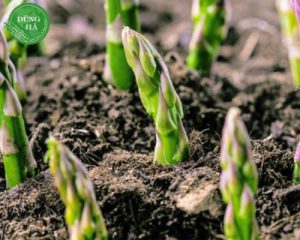
Harvesting
There are two methods of harvesting asparagus
- For cutting, use an asparagus knife. Cut the spear off about 1-inch below the soil line. Use caution not to cut too deep, as you may damage the asparagus crown. We advise adding a 4-inch ridge of soil once the spears begin to emerge – this will help prevent crown damage by workers cutting too deep.
- Snapping simply involves breaking off the spears, leaving a stub on the plant. The upper portion that snaps off should be all green and all tender. One disadvantage to snapping is that the stub left behind can act as a breeding ground for diseases.
As the asparagus grows, gradually fill in the trench with soil, being careful to avoid covering any asparagus foliage. The trench should be filled to ground level by the end of the first growing season. Side dress a 5-10-10 fertilizer in late July or early August at the rate your soil test specifies.
Late in the fall of the first growing season, after the fern has turned completely brown, remove the brush (old stalks) and any weeds. In the following spring broadcast lime as needed to maintain the proper soil pH, add fertilizer and apply herbicide.
Remove brush
Each spring, before the asparagus emerges, broadcast lime if your annual soil test determines it is needed. At the same time spread half of the recommended fertilizer and work it in. Apply the herbicide. Immediately after the harvest season ends, spread the other half of the recommended fertilizer, work it in, apply the herbicide, and then irrigate one inch of water.
Conclusion
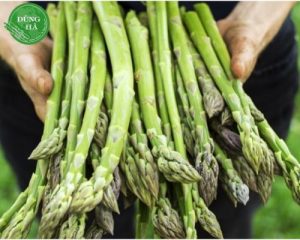
This will help speed the development of the fern so the photosynthesis process can begin. Whichever method you choose, harvest the spears when they are between 7-10 inches long. Harvest all spears that come up during the harvest season. Contact to know more information : 0984399922
http://www.google.com.cn/url?q=https://nongsandungha.com
http://www.google.com.ru/url?q=https://trangvangnongnghiep.net/